Do you have a flash drive you’re unable to use? If it’s stopped working for any reason, you will either find the memory used up, even though there are no files inside, or Windows just won’t let you format the drive. In the worst case, the pen drive name refuses to show on your computer. To fix an unformattable and unusable USB drive, use the native Windows method or one of the other external tools mentioned in this guide.
Tip: learn how to enable quick removal of USB drives in Windows.
1. Wipe the USB Drive Clean with Diskpart Command Line Tool
Windows comes with a built-in format disk option to erase everything from a USB flash drive. This is accessible from a simple right-click, but at this stage, it probably won’t work.
If you no longer need the data in the removable media, Diskpart, a command-line tool, is a better way to help you get to the root of the problem. To get started, run the Command Prompt as an administrator. Make sure the USB drive is inserted, and perform the following steps.
1. As soon as it starts, enter diskpart, then enter list disk, which will provide a list of each disk connected to your computer. Here, you can quickly identify your USB drive by its size.
2. Enter select disk #. Instead of #, you have to insert the numerical value of the removable drive, which is 1 in the image. You will see a success status message: “Disk # is now the selected disk.”
3. To wipe your removable media, enter clean. This will empty the contents of the USB drive completely.
Warning: do not accidentally select your computer’s hard drive number – in this case, it’s 0. It can erase your main hard disk completely, so proceed with caution.
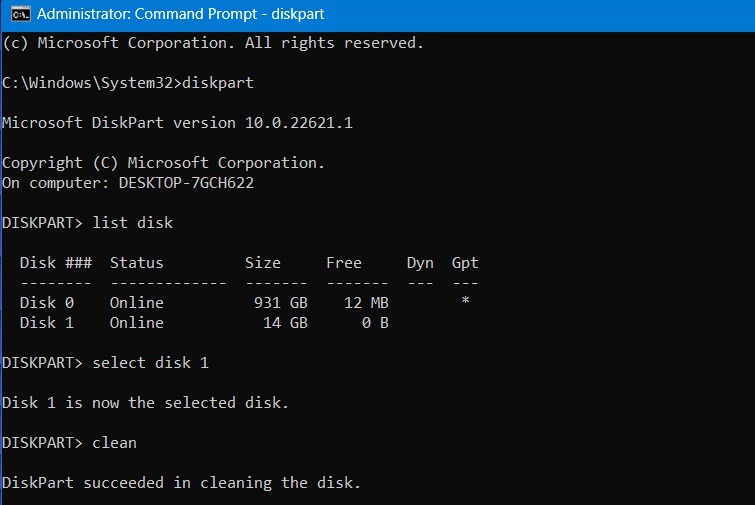
Sometimes the disk for the USB may show “no media” and 0 bytes, which is normal. As long as “Disk 1” shows properly, there is a USB drive in the system.
Even after you wipe your USB drive clean, your computer will not be able to view it. The next step will correct this problem.
Good to know: are your USB 3.0 ports not working? Try these tips to restore functionality to them.
2. Reallocate the USB Drive Volume from Disk Management Console
We will reallocate the USB drive volume from the previous section using the Disk Management Console, which is easily accessible from the search menu. Alternatively, press Win + R to open the Run command, and enter diskmgmt.msc.
Once the console window opens, right-click on the disk number for your USB drive with the “unallocated” status, and select New Simple Volume. In some Windows versions, it may be available as Create Simple Volume.
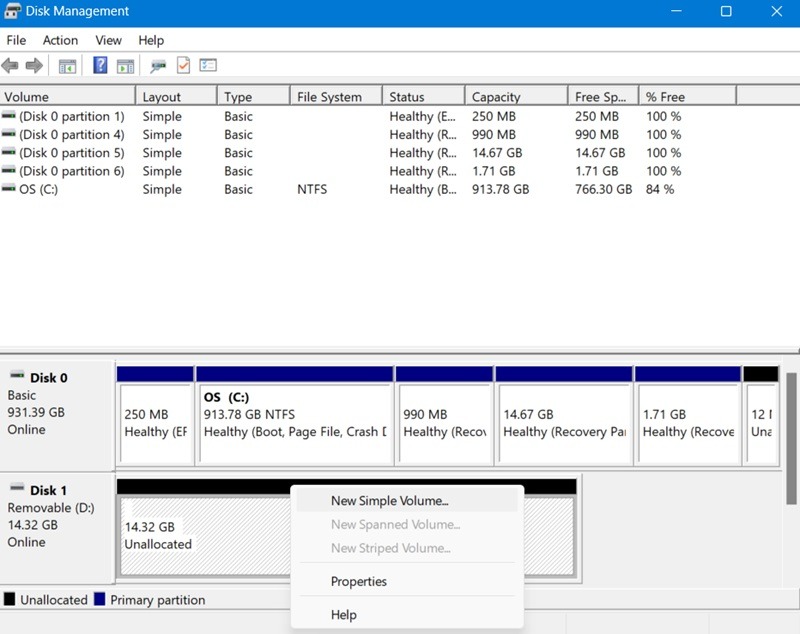
It will lead to a New Simple Volume Wizard pop-up window. Click Next to specify the volume size for the pen drive, or select the maximum volume, which is shown as a default unit in MB, then click Next.
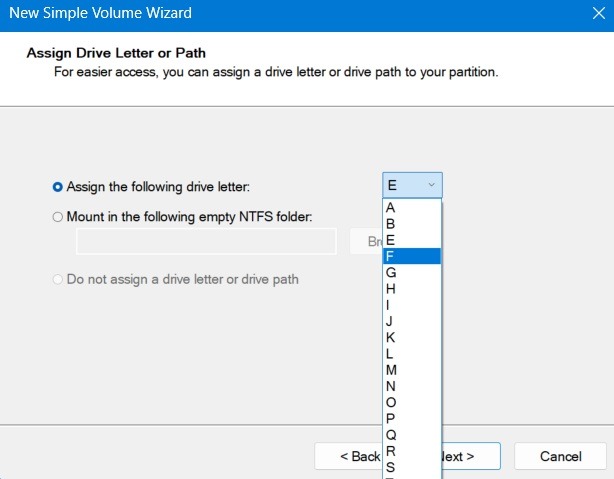
Select Assign the following drive letter. We are choosing F, as shown here. Go to the Next screen.
Format the partition in the next step. This may be just an extra step, as you have already wiped the data clean. But it is always better to be sure.
Enter a name for the partition in the Volume label field. As with the previous approaches, choose a file system, allocation unit size and more. Then, go to the last screen and click Finish.
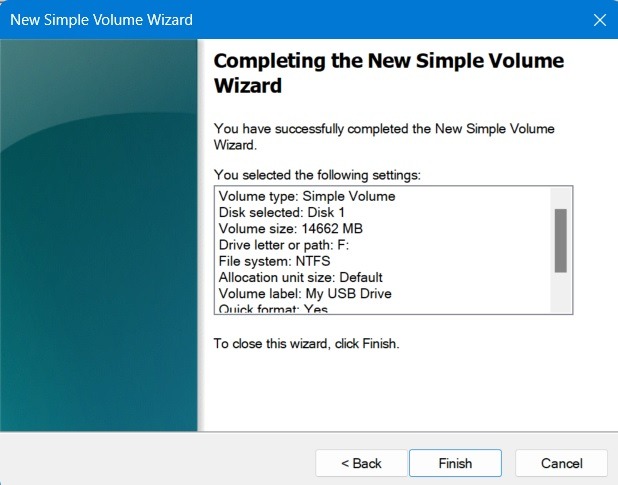
After you reallocate the unallocated USB drive space, you will be able to view the USB drive storage in Windows file explorer. The USB drive is visible as a healthy partition when you open Disk Management again.
Third-Party Options
Listed here are some of the best third-party tools to fix and format USB drives that seem unformattable and unusable.
1. FormatUSB
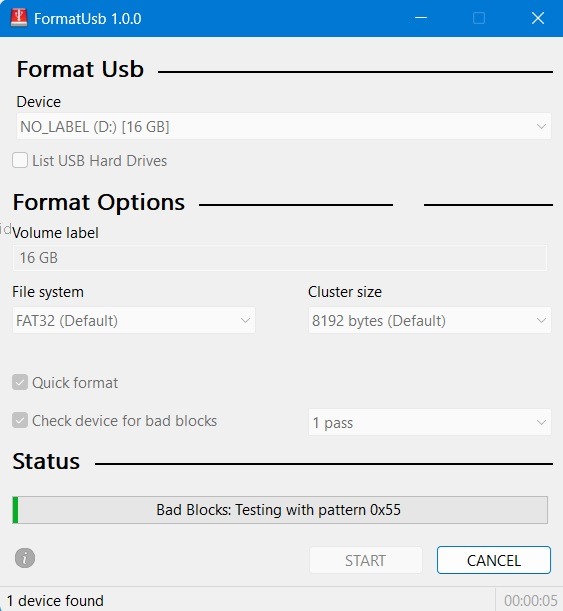
Close on the heels of the native Windows method, the free “FormatUSB” utility is one of the best ways to restore the USB drive’s sanity. You don’t need to install anything, just a simple download will do.
The tool automatically detects a USB drive on your device. After that, enable Quick Format and Check device for bad blocks. Click Start to restore the USB drive to its mint condition.
Once the process is complete, the utility will fix the unformattable USB problem. It also resolves many common USB errors, such as “USB drive detected but not accessible,” “cannot format USB drive,” and “the disk is write-protected.”
Tip: are you facing the USB device not recognized error? Check out these fixes.
2. HDD LLF Low Level Format
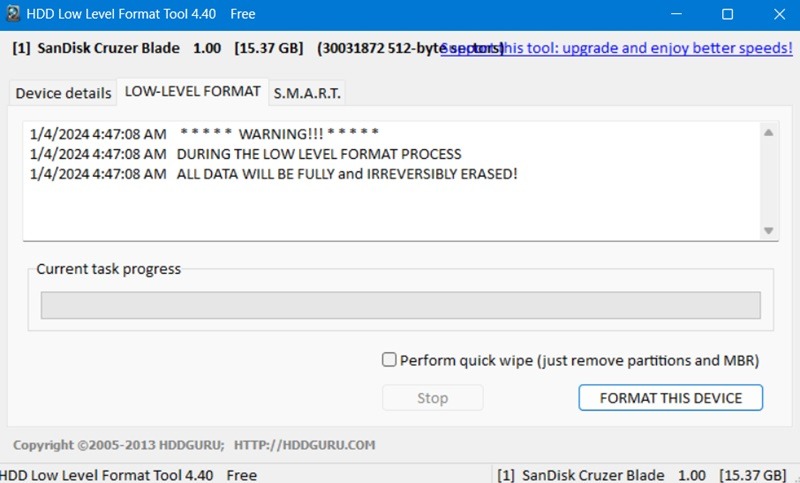
An oldie but a goodie, HDD LLF has been around for a long time and supports low-level formats, like USB, SATA, and other forms of hard drives.
Low-level formatting means that the format will bypass the filesystem layer completely, eradicating all data on the drive and giving you a fresh start. If your flash drive was rendered unformattable, due to bad sectors or dodgy files, this tool will have you covered.
Other external tools that can be used to restore an inaccessible USB drive are:
- JetFlash Recovery tool: if your flash drive can’t be read or is bringing back bad sectors, then JetFlash is capable of brute-forcing the format process and giving your seemingly borked flash drive a new lease on life. It works with Transcend as well as other USB drives.
- HP USB Disk Storage Format Tool: has an extremely easy-to-use interface. HP USB Disk Storage can quickly format any problematic USB drive.
Tip: is something wrong with your USB ports? Learn how to check the power output of your USB ports to stay ahead of the problem.
Find Out Whether Your USB Drive Is Worth Saving
We have to be clear about the difference between an “unformattable, unusable” USB drive and a “corrupt/damaged” drive. When the stick is damaged beyond repair, there’s no option but to replace it. On the other hand, if you were just unable to detect or use the removable media, then it can be repaired.
Let’s take the typical situation where your computer/laptop is able to easily detect the USB drive, and you just want to know whether it’s bootable or corrupt.
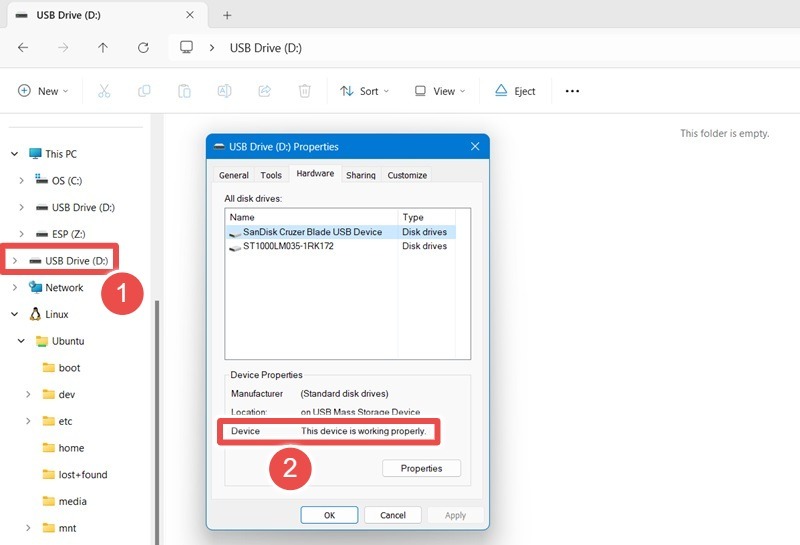
Open File Explorer, and find your drive under This PC on the left. Select the Properties of the USB drive folder, and check the Hardware status. If it says, “This device is working properly,” the USB drive is worth saving.
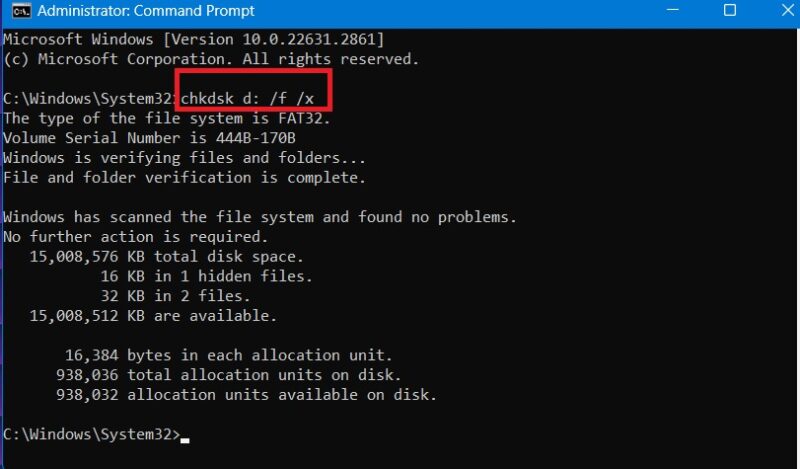
You may also use chkdsk /*Drive Name*/: /f /x in Command Prompt or Windows Terminal to locate and solve any errors. It mainly comprises the drive letter of your USB after chkdsk entry, which you can find in File Explorer.
Accordingly, /f refers to any attempts to fix the errors on the USB drive, and /x will force the USB drive to be unmounted before attempting any scan. As shown below, chkdsk shows there are no errors or bad sectors in the USB drive.
Once you restore your USB drive, you may need to create a bootable flash drive with Rufus, one of the best tools for that purpose. If your pen drive carries sensitive information, it’s good to learn how to encrypt and decrypt the device.
Image credit: Pixabay. All screenshots by Sayak Boral.
Our latest tutorials delivered straight to your inbox